
GOING BEYOND AGATEWARE
I have been working with colored clay for more than 25 years, staying mainly with hand built work because I am not a huge fan of Agateware and thought there were no other throwing options.
I am not dismissing the process, it’s just that I like being able to place the colors where I want them, not where they happen to hit.
I had ideas on throwing that I thought might work but my limited throwing skills stood in the way of experimentation.
Finally though, I just had to know.
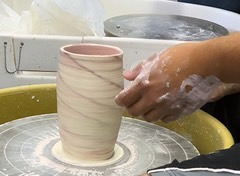
My first step was to take a refresher course on the wheel. After three months of throwing and slicing cylinders, I felt somewhat confident in my ability to throw simple forms.
The second step of this project happened at a desk. I sketched out every way I could think of to place colored clay and patterns into a ball of white clay. The color additions would be thick and thin, single color and multiples stripes and patterns. Sketches in hand, I started to mix color and throw.
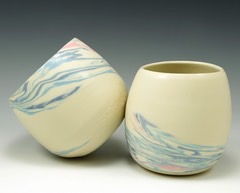
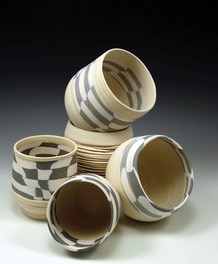
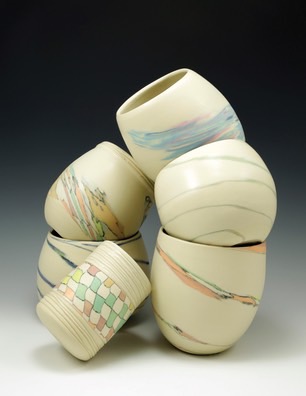
The Hamburger
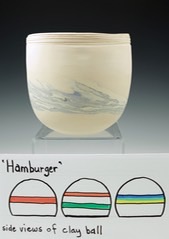
Maybe I was hungry, but this name seemed appropriate. Basically you just place your colored clay anywhere between two layers of white.
The result is a streak of color and as you can see, it all depends on where you placed the color to start.
This image shows multiple layers in the hamburger style. Thrown by Matt Choi.
The Hot Cross Bun
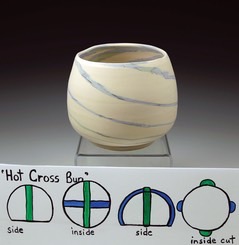
Still hungry I guess, but this placement results in very interesting swirls and the bottom has a lovely pattern too.
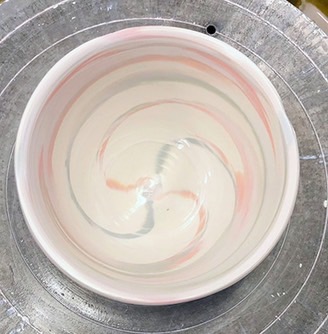
Bowl thrown by Matt Choi
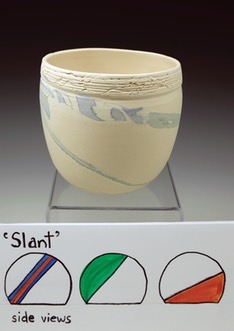
The Slant
You can place a stripe of clay or a whole segment of color to get various effects. Each one I did resulted in an interesting fish hook pattern on the exterior.
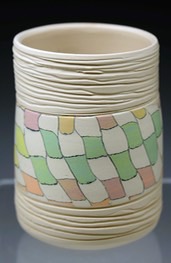
Vertical
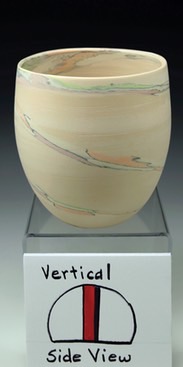
The placement here is straight up and down. You can use stripes of color or just one … in this one I used a pattern to see how the colors would spread.
Wraps
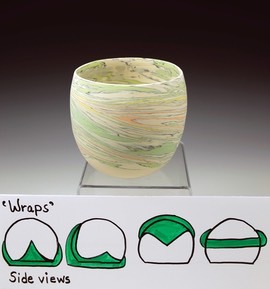
You can also wrap solid color or patterns around your ball of white clay and throw.
You might need to pat these colors on with some energy to make sure they don’t move all over while you are throwing.
I would sometimes let them rest but this can also cause the clay memory to set in and make throwing more difficult.
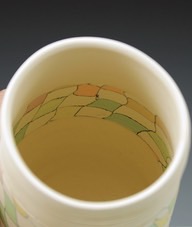
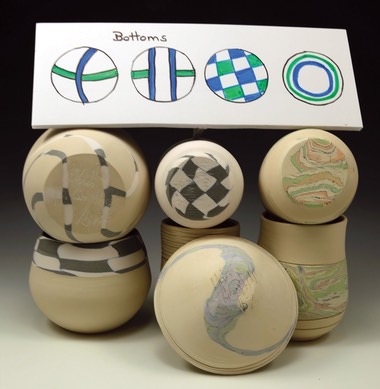
BONUS!!
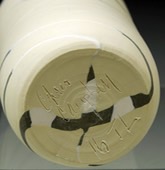
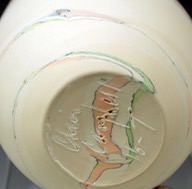
An added Bonus of using color this way is that you get the most wonderful bottoms on your pieces. Trim and enjoy.
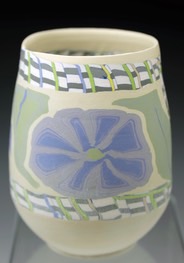
Keeping patterns intact
I also wanted to find a way to add patterns throughout a thrown piece while keeping the patterns intact. I was so lucky to find a great video on You Tube made by Tineke van Gils. Watch it and you will learn a terrific new technique. She is a marvelous thrower.
https://www.youtube.com/watch?v=youRny_yPyY
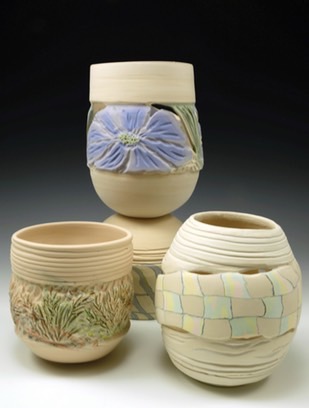
My pieces made using Tineke's Process