Secondary colors are the result of mixing your primary clays bodies together. By learning to create these blends you can dramatically expand your color palette.
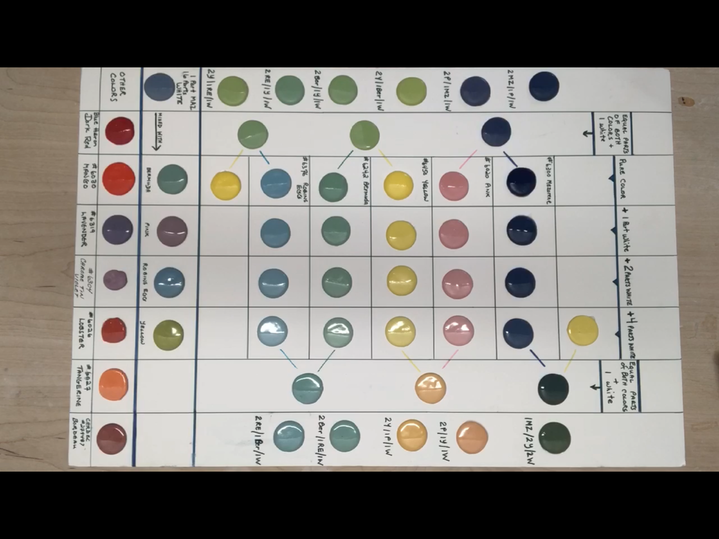
From my basic colors of blue, pink, yellow I can create purples, greens and peach tones simply by using the Skinner Blend technique
Here is a quick video of one basic technique:
In 1996 Judith Skinner invented the ‘Skinner Blend’ method for creating secondary colors with polymer clay. She used a pasta machine to blend colors. ( potters who only need a small amount of colored clay can to use it too if they place fabric on both sides of the clay to avoid sticking.)
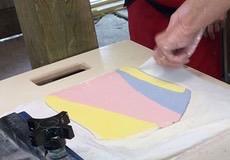
I use a two roller, slab roller to make my color blends. One roller moving clay over a board works, but you need to flip it often so both sides get pressure from the roller. You can even use a rolling pin as long as you remember to work from the same end and flip often.
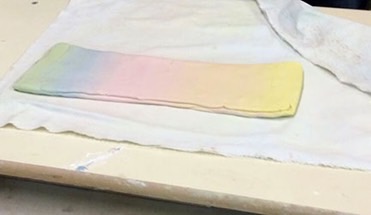
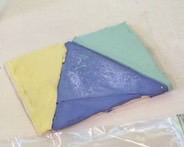
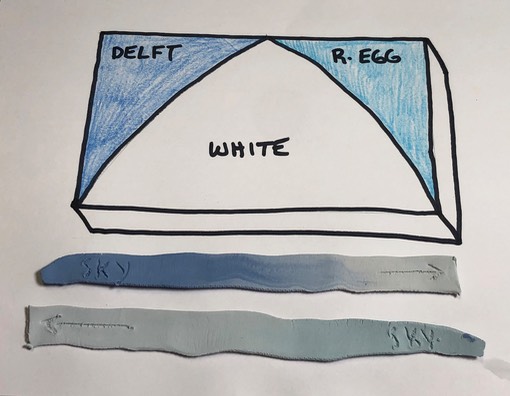
Below are images of the most simple blend of two colors with white clay as a base.
STEP ONE: Use as much or as little clay as you need. You don’t have to have even amounts…you could add a thick layer of white underneath for paler hues.
STEP TWO: Roll to about 1/2 the original width then flip over so either end is always facing the roller. Do not roll from the sides or you will just get one solid color.
If you are using a rolling pin, roll then flip sides with each roll to keep the pressure even.
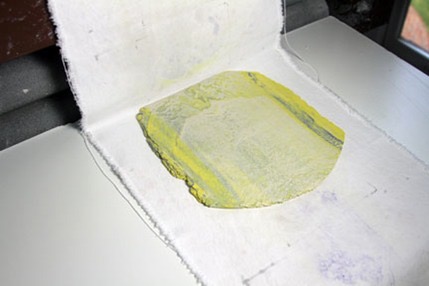
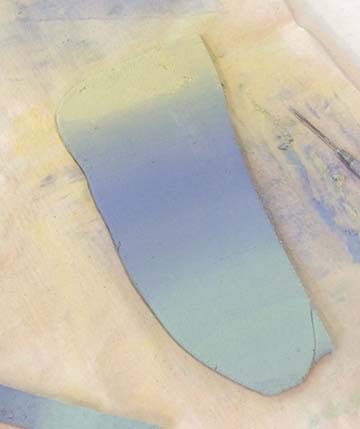
It all looks awful until it starts to look great ... usually after about 15-20 times through the slab roller. You can stop anytime you like the colors … you don’t have to count, just go with your eye.
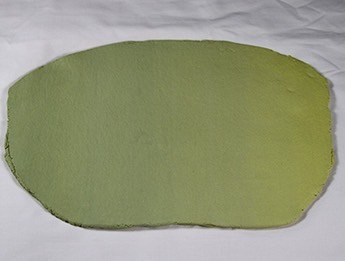
This wet piece is very dark green. The fired piece will be even darker. You can lighten it by putting a sheet of white clay across the whole slab, then rolling it exactly as you did the original. You could also adjust it by adding more yellow and working it the same way. You are not stuck with what you get at first.
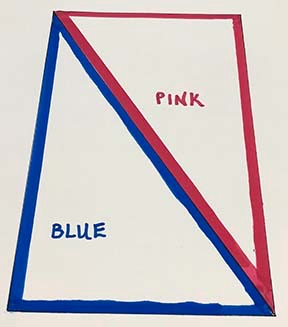
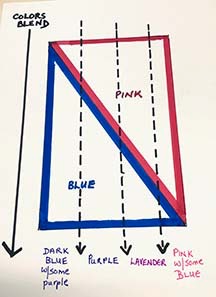
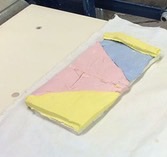
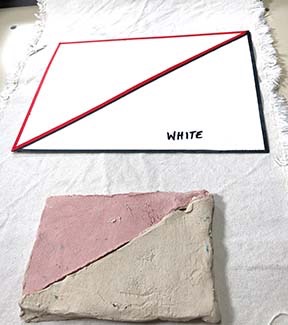
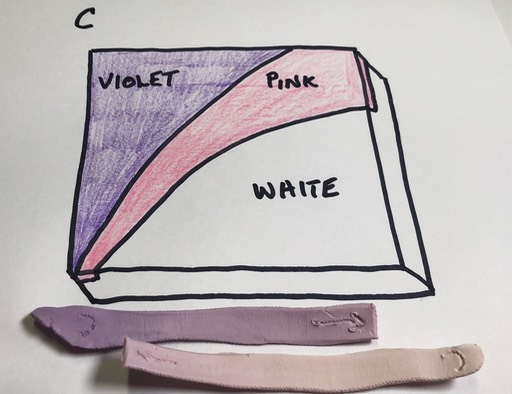
You can also get many colors at one time, but PLAN your blend BEFORE you begin. It only takes a minute to make sure that every color will fold over a different color in order to blend them.
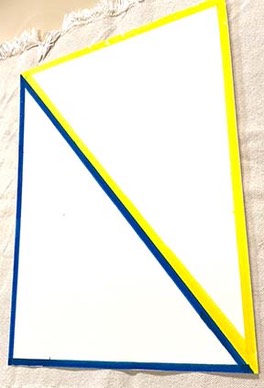
Here is the color progression for a multi colored blend.
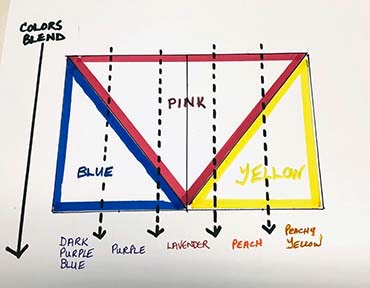
Picture that the colors blend together down the front of your design as shown below.
This will give you blues to lavenders.
Now, add a pink and a yellow triangle to it to get peachy tones
Now, if you like, add another yellow and some green to get your lime greens.
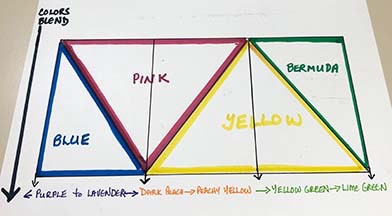
Finally, add a bit of blue to the Bermuda and a bit of white on the end.
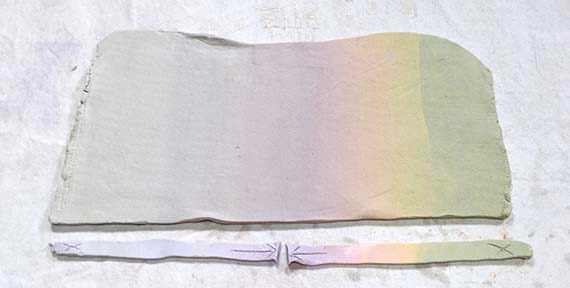
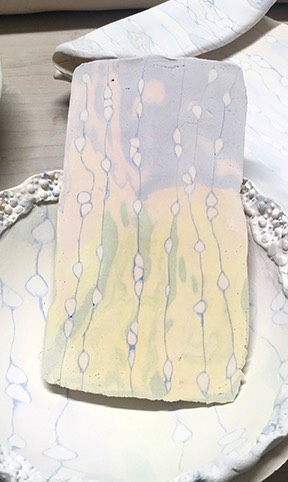
This is the final slab of color and a patterned cane I made from it.
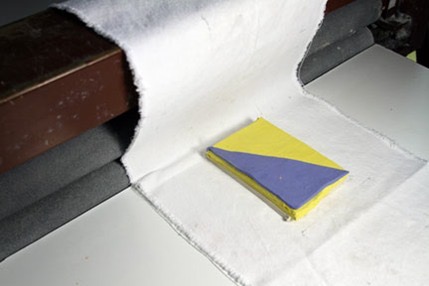
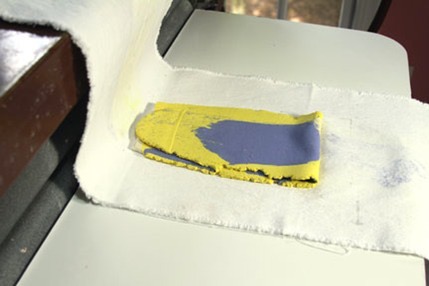
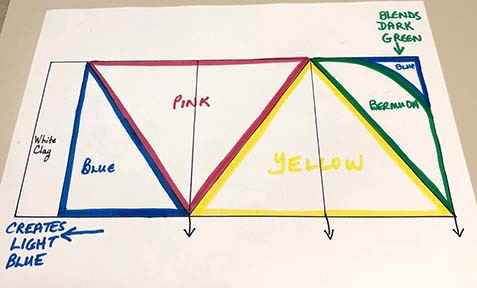
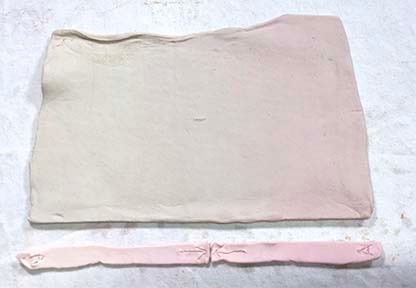
Here is another multi color blend
Pay close attention to process as you do this since you will get muddy brown if you mistakenly feed the clay at right angles to the blend.
If you fold the same colors over each other they will of course stay that color.
You can also do a single color progression.
EVOLUTION of the Basic Skinner Process over the years

As you might expect people have taken this even further to get the bright blends they want.
Mostly they wanted to get the “ weed spot” … those colors at the middle of the blends.
To do this they changed the proportion and size of the colors.
To get brighter colors, simply add more white clay.
I encourage you to Google “Skinner Blends” and be amazed at the wide variety of techniques for bothblending and creating canes.
* Photo credit Chris Campbell, Erika Sanger
CLICK HOMECLICK here for a FREE video Now